
Step one: Initial Sketch
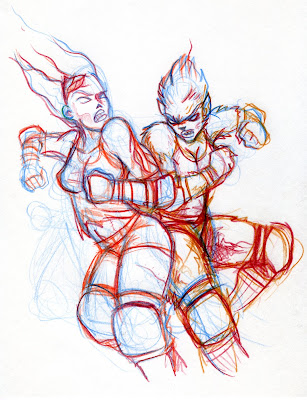 Having been given the brief by LRD I played around with some ideas and settled on an image I thought would work-a clash between the Zombie Queen and The Wolf Girl. I did the initial rough sketch then added details and refined the image with further passes with different colours. When I was happy with this I then scanned the image to Photoshop and got to work.
Step 2: Inking  The next stage was the inking. I currently use Photoshop for this, and create a separate layer for each character. First up was the Zombie Queen-I tweaked any areas that needed it, then set about inking over the main outline of the character, adding finer detail where required.
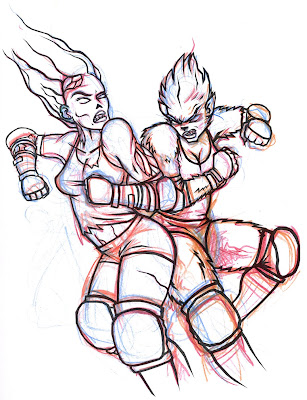
I then repeated the process on a different layer with The Wolf Girl, again tweaking any areas that didn't look quite right. When I was happy with this, it was time for some colour...
Step 3: Basic Colour
Step 3: Basic Colour
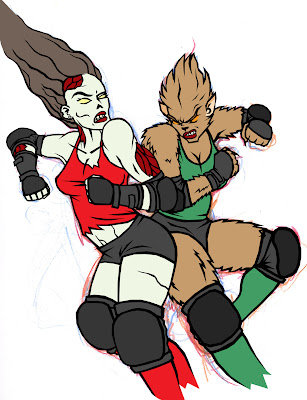 I have to say that for me this is the part of the process that really shows up what needs adjusting. For each character I laid down a layer for each colour and made sure I named them correctly so I knew what was what if anything needed changing. I played around with the different skin tones, fur colour etc, and decided which character would represent which team and matched the colours accordingly. I always think that the drawing looks a bit flat at this stage, but you get a good general impression of what the end result will be like.
Stage 4: Shading
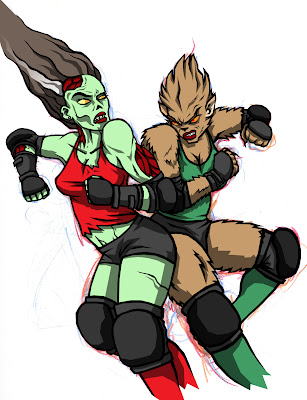 This step really brings the drawing to life! I created another layer on top of the colour layers but below the inks for each character, and then began blocking in areas of shade with the capture tool and filling with black. I then reduced the opacity to get the desired shade. Because some areas came out too dark, and some too light, I created another layer for these areas and repeated the process to get the result I wanted. I also changed the skin tone on Zombie Queen and made a few other minor colour changes, which tends to happen at this stage as the image gets tied together with the shading.
 Step 5: Highlights and fades
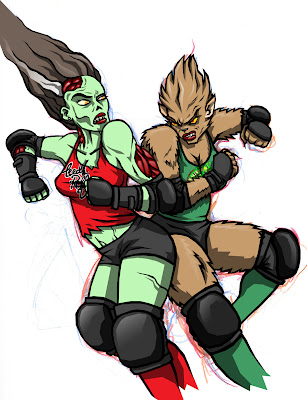 This next step is really the icing on the cake. I created another layer and captured any area I wanted to add a bit more form to, then used the gradient tool to make a fade of black over the area. Then, much like the shading layers, I played with the opacity until I was happy with it. Similarly for the highlights, I captured an area I wanted to lighten and filled with white gradient. I don't use this stage in all the illustrations I make, but it can really add an extra dimension where needed.
Step 6: Layout and background
 As this illustration was going to be a poster and cover, it was doubly important to get the layout right. I created a separate file for the background so I could play around with it with no fear of accidentally screwing up the character illustration. I aimed for the background to be a mixture of old carnival and wrestling posters and EC horror comic covers, and think I hit a happy medium. It was then a case of blocking in the various colours and textures, which I again laid out on their own layers for making any changes easier. I then imported the character illustration and made any final changes.
Step 7: Lettering
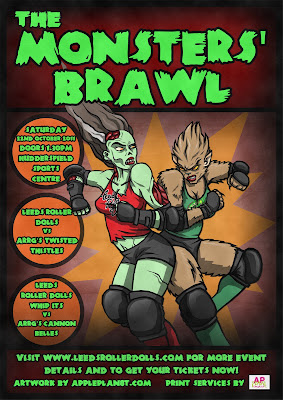 For the final step I chose a font that would go well with the subject matter and pulp horror feel of the design, and tried to choose a colour that would really stand out! It was then just a matter of adjusting the size and layout of the text to fit. Where needed, I adjusted the background elements to accommodate text and make it fit correctly. I also added the sponsor logo and any text effects. The example above is the poster, but I also made sure the text for the cover worked just as well.
 For the final step I chose a font that would go well with the subject matter and pulp horror feel of the design, and tried to choose a colour that would really stand out! It was then just a matter of adjusting the size and layout of the text to fit. Where needed, I adjusted the background elements to accommodate text and make it fit correctly. I also added the sponsor logo and any text effects. The example above is the poster, but I also made sure the text for the cover worked just as well.
The final piece
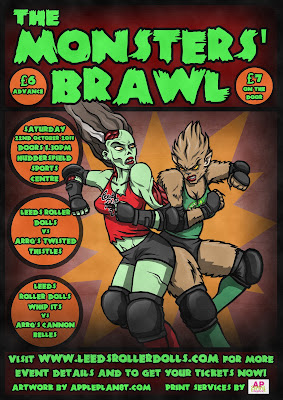 And so the final poster, with the prices added and a final spit and polish! Go and check out the LRD Events Facebook page for details of this and other upcoming bouts!
 And so the final poster, with the prices added and a final spit and polish! Go and check out the LRD Events Facebook page for details of this and other upcoming bouts!


